
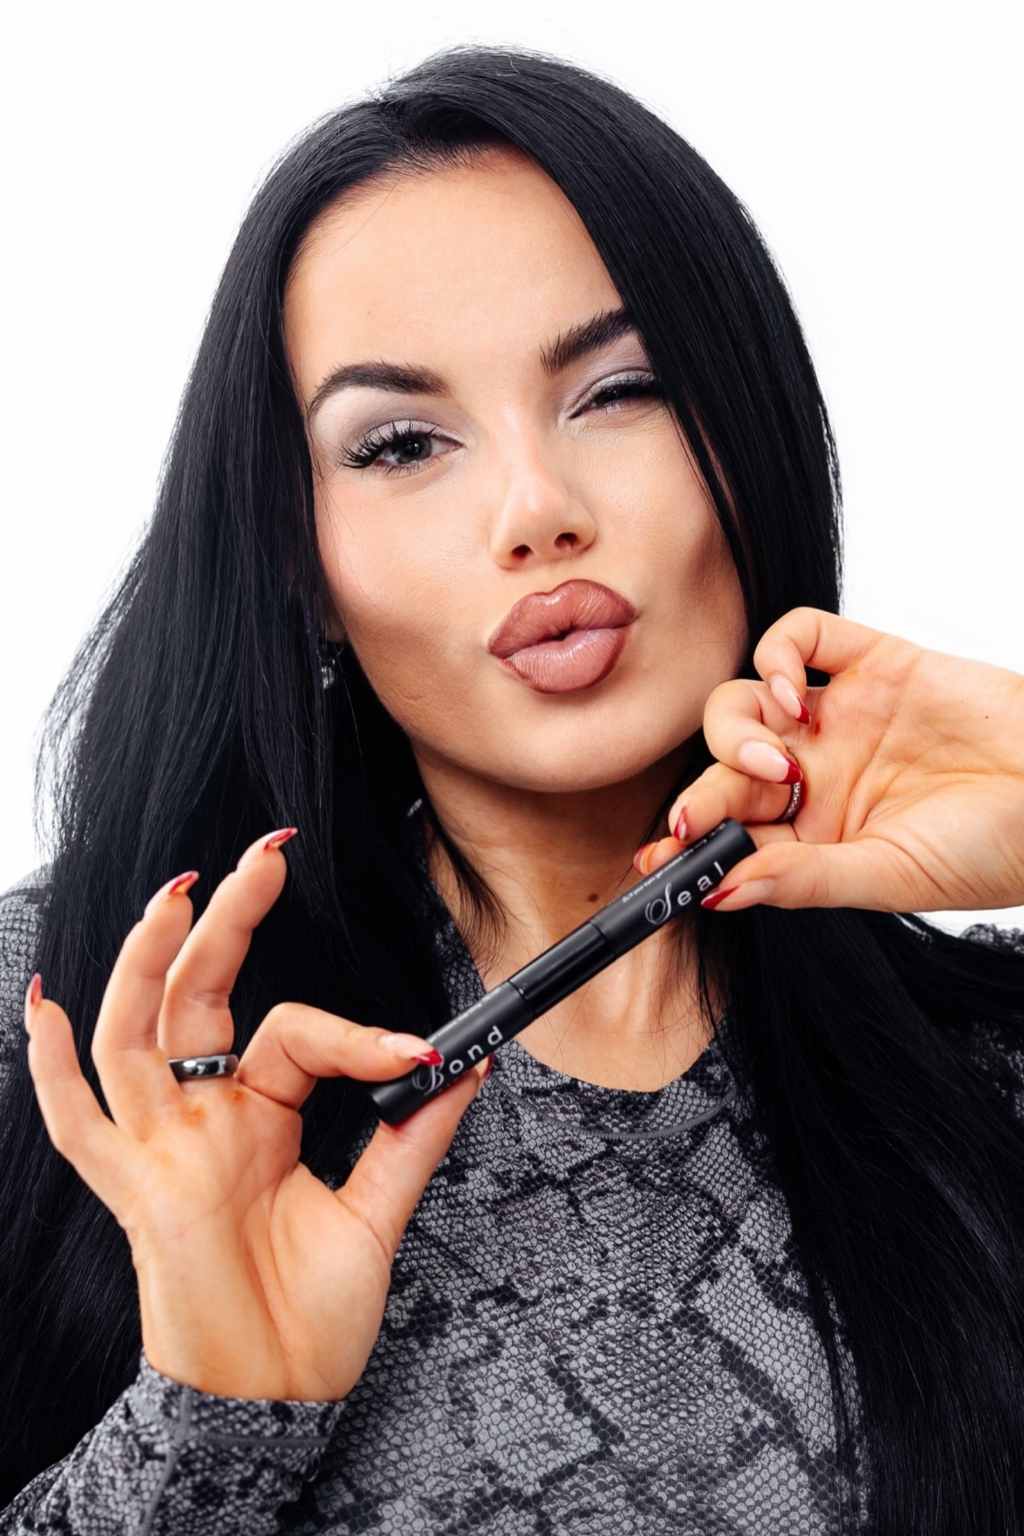
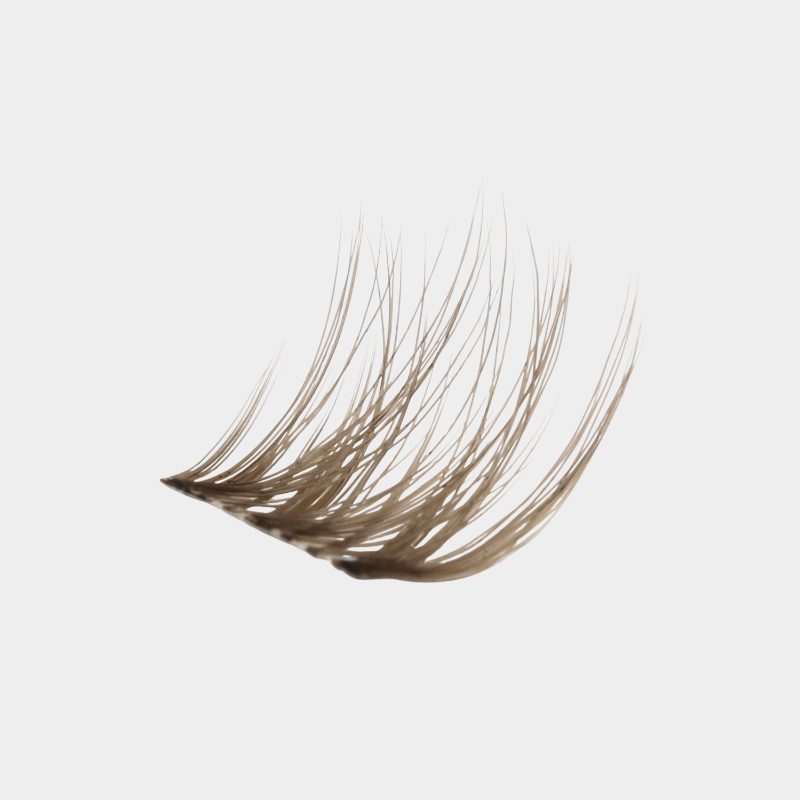

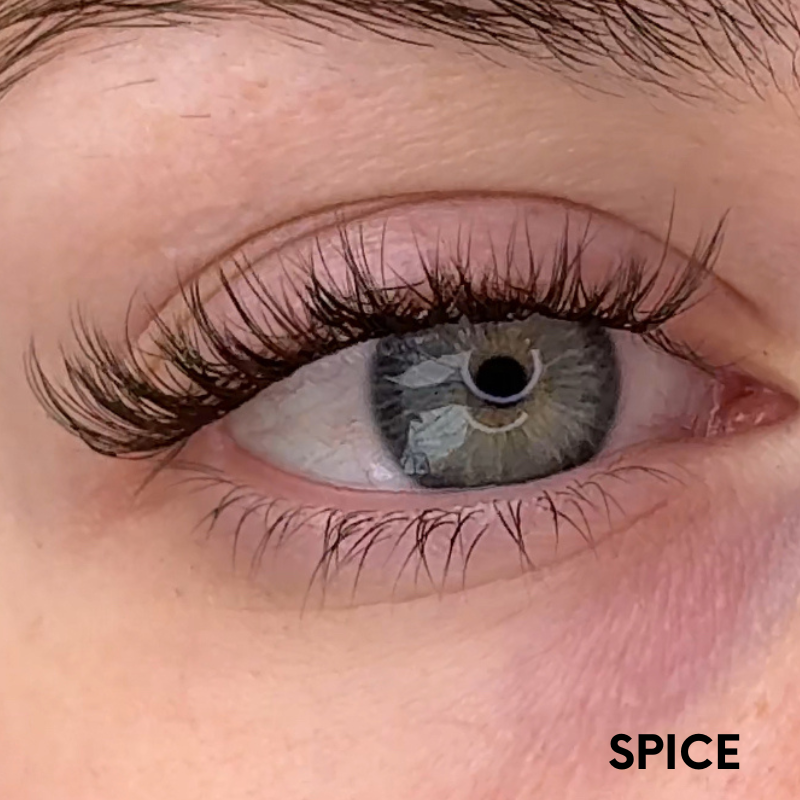
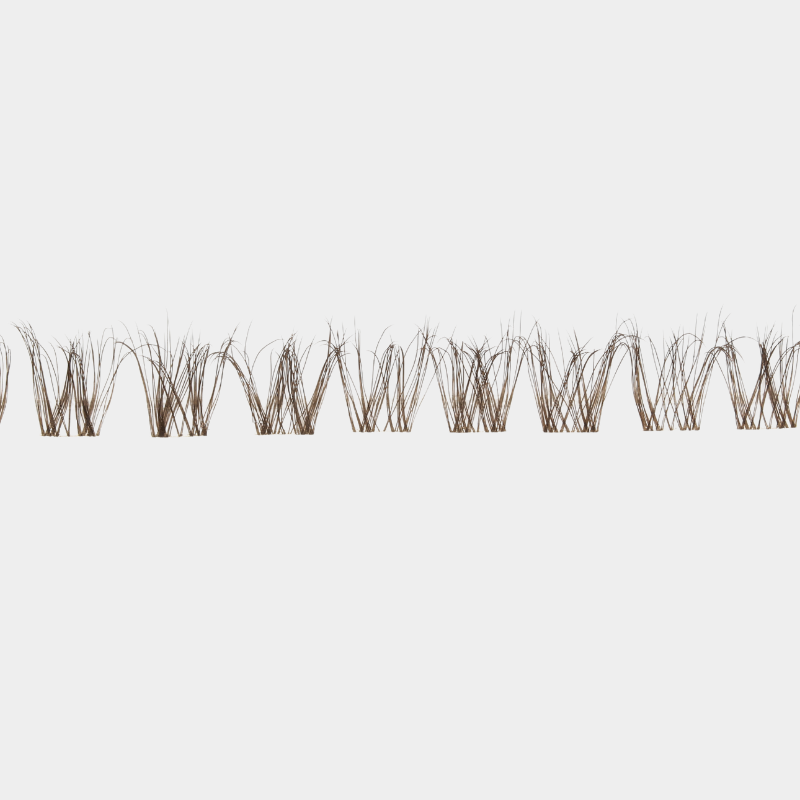
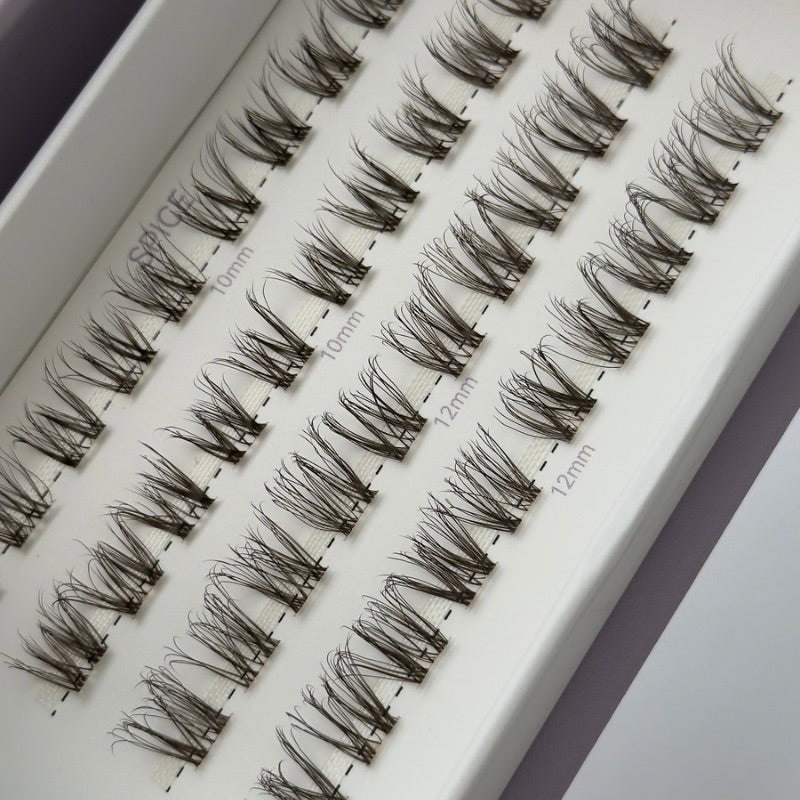
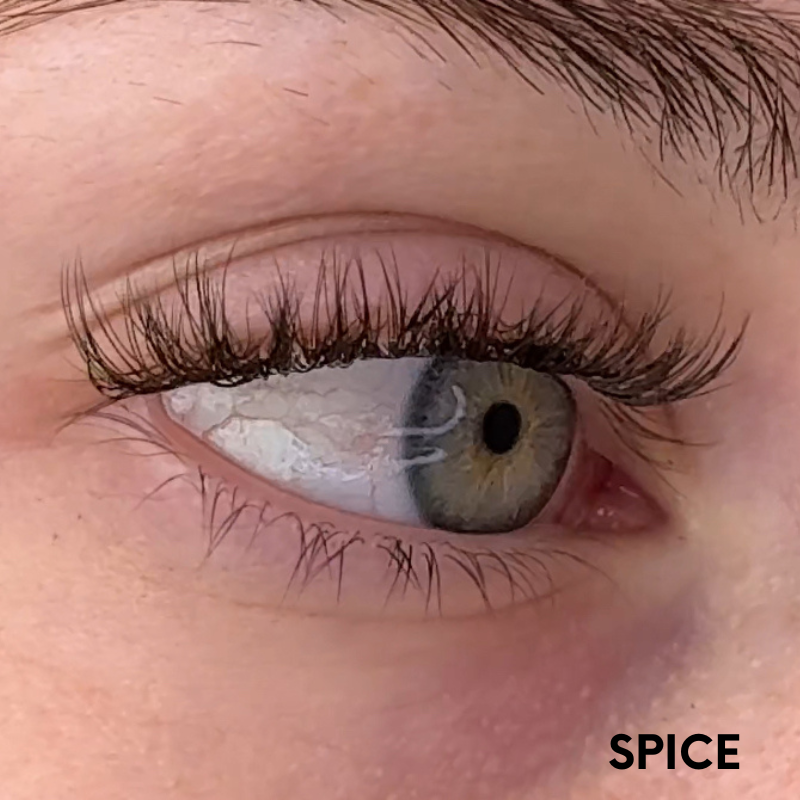
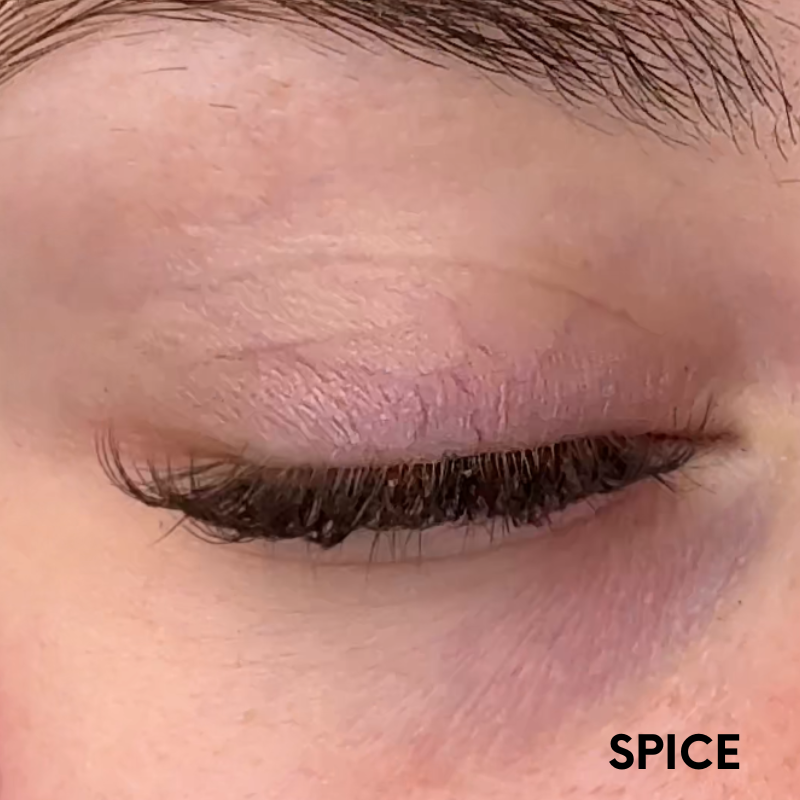

SPICE
Meet SPICE.
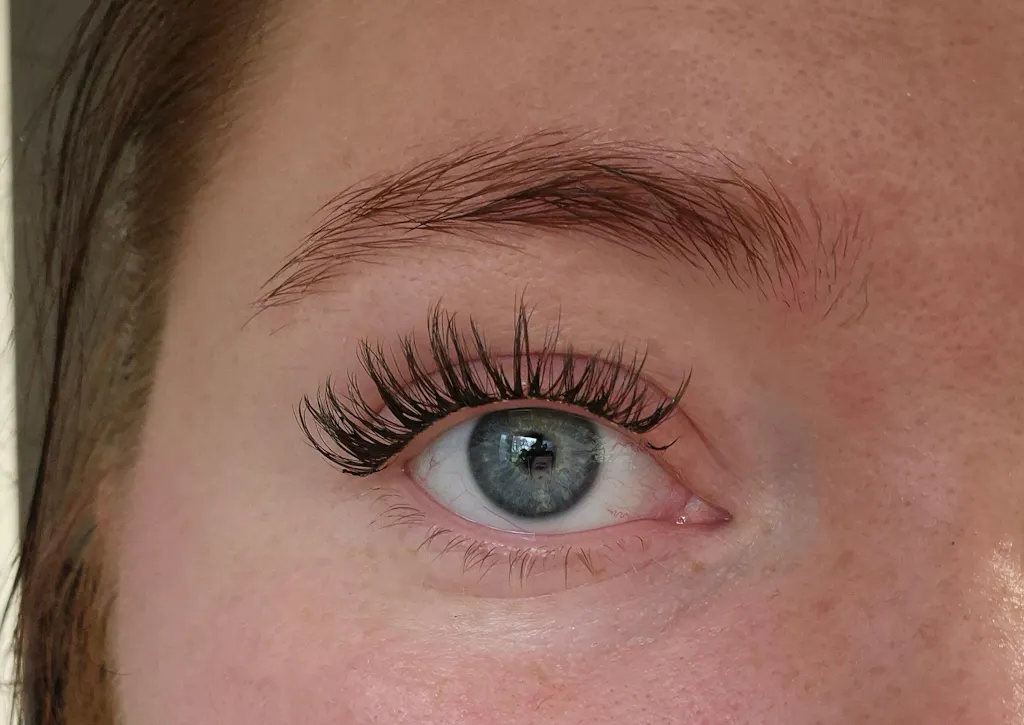
No smudge. No crumble. No mid-day panic. All natural lengths of 10mm and 12mm.
You know that moment you catch your reflection at 3pm and realise your mascara has betrayed you again? Yeah… that ends today.
Because you’re still buying mascara, when you could be wearing HAYATI LASHES’ brown DIY lashes, the ones that give you a 7-minute morning routine and an all-day “I actually slept” face.
What you get with HAYATI DIY lashes:
• Wear them for 7+ days
• Re-use them
• Lightweight
• Zero bands. Zero bulk.
• Unique HAYATI styles
• Versatile enough for every mood
• Mix & match.
And when you bundle up? Your Essential Kit Includes:
• Your lash style of choice
• 2-in-1 Bond & Seal Wand
• Gentle Remover
• Sticky-free Cluster Applicator
• Lash Curl Enhancer
Effortless lashes. Every. Single. Week.
- Last up to 7+ days
- Re-usable
- Extremely lightweight
- Band-free
- Unique HAYATI styles
- Versatile
- Create your own lash mapping
- Can mix different DIY styles together
- Vegan
- Cruelty-free
- Handmade
- DIY lashes are reusable up to 4-5 times with good care
- Strip lashes are re-usable up to 20-25 times.
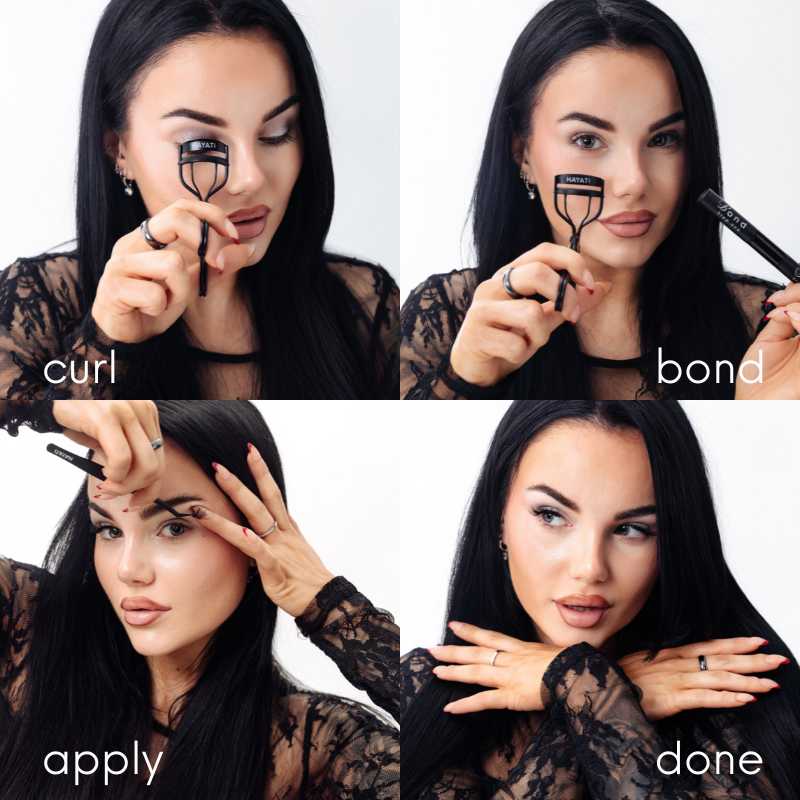
Step 1: Brush a thin layer of Locked In glue underneath your natural lashes, close to the base (not on the waterline).
Step 2: Wait 30–45 seconds until it's tacky — not wet.
Step 3: Apply your lash clusters one by one — press and hold for a few seconds.
Step 4: Use a lash applicator to gently clamp them in for a sealed & snatched finish.
That’s it.
For a detailed tutorial with pictures please see this page!
To keep your clusters looking fresh and locked in for days, follow these tips:
Avoid Water for 24–48 Hours
Let the glue fully cure before exposing your lashes to moisture.
Hands Off When Wet
Do not touch, rub, or pull at lashes while they’re damp — this weakens the bond.
Reclamp And Seal After Showering or Lash Baths
Use your applicator to gently clamp and reseal the bond after getting your lashes wet.
Stay Oil-Free
Avoid oil-based products near your eyes. Oils break down lash glue and cause lifting.
Advisory For DIY/Lash cluster bond
Applying to small section of outer corner lashes.
We recommend completing a patch test before using DIY/Lash cluster bond. Simply apply a small amount of bond to a small section of outer corner lashes and wait for 24 hours. If you experience any reactions/sensitivity, please discontinue use.
Advisory For Strip Eyelash Glue
Dropping glue on skin behind the ear
Using a micropore brush apply a small amount of lash adhesive behind the ear, on the lower side as this is a very sensitive area and allow 24 hours to see if any reaction is caused.
If any irritation presents using either method rinse the area thoroughly with cold water for several minutes to remove the product completely. If irritation persists please seek medical attention.
Eyelash Glue manufacturers recommend that you follow a simple patch test procedure to replicate the treatment 48 hours before the full application is carried out.
*Shelf life on all lash adhesive is 12 months (unopened) from date of purchase.
RETURNS
----
We have a 14-day return policy, which means you have 14 days after receiving your item to request a return.
To be eligible for a return, your item must be in the same condition that you received it, unworn or unused, with tags, and in its original packaging. You'll also need the receipt or proof of purchase.
To start a return, you can contact us at contact@hayatilashes.com. Please note that returns will need to be sent to the following address:
Oxledsvägen 109c lgh 1302
43367 sävedalen
Note that HAYATI is not covering the shipping return fee.
If your return is accepted, we’ll give instructions on how and where to send your package. Items sent back to us without first requesting a return will not be accepted. Please note that if your country of residence is not Sweden, shipping your goods may take longer than expected.
You can always contact us for any return questions at contact@hayatilashes.com
Damages and Issues
Please inspect your order upon receipt and contact us immediately if the item is defective, damaged, or if you receive the wrong item, so that we may evaluate the issue and make it right.
Certain types of items cannot be returned, like perishable goods (such as food, flowers, or plants), custom products (such as special orders or personalized items), and personal care goods (such as beauty products). We also do not accept returns for hazardous materials, flammable liquids, or gases. Please get in touch if you have questions or concerns about your specific item.
Unfortunately, we cannot accept returns on sale items or gift cards.
Exchanges
The fastest way to ensure you get what you want is to return the item you have, and once the return is accepted, make a separate purchase for the new item.
European Union 3 day cooling off period
Notwithstanding the above, if merchandise is being shipped into the European Union, you have the right to cancel or return your order within 3 days for any reason and without justification. As above, your item must be in the same condition that you received it, unworn or unused, with tags, and in its original packaging. You’ll also need the receipt or proof of purchase.
Refunds
We will notify you once we’ve received and inspected your return to let you know if the refund was approved or not. If approved, you’ll be automatically refunded on your original payment method within 10 business days. Please remember it can take some time for your bank or credit card company to process and post the refund too.
If more than 15 business days have passed since we’ve approved your return, please contact us at contact@hayatilashes.com
Choose options
before & after

Before

After
how to apply

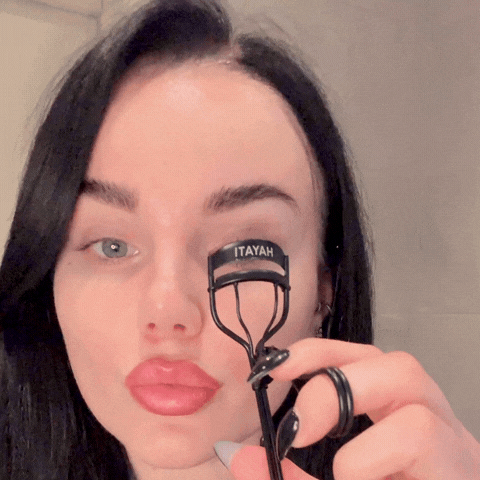
STEP 1
CURL YOUR LASHES
Start by curling your lashes for the perfect bend of your natural lashes. This will create a good base for the DIY lashes to sit on top of.
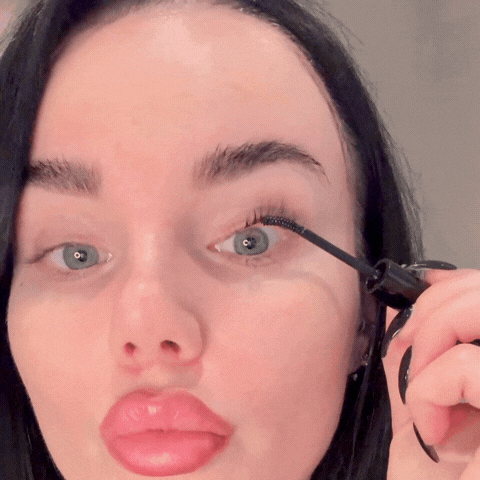
step 2
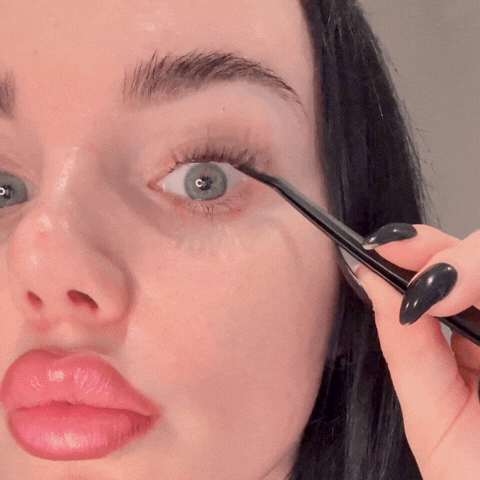
apply lash bond under your natural lashes
Apply your 2-1 lash bond & seal wand under your natural lashes in a dabbing motion. Be mindful of using the bond as a mascara. This will cause clumpy looking lashes as well as uneven lashes.
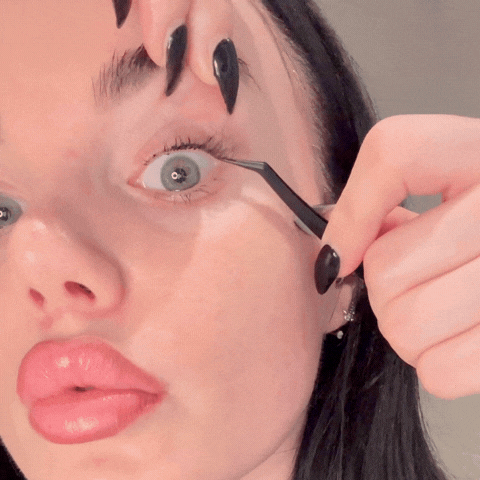
step 3
Application
Now it's time to apply the DIY lashes. Apply the DIY lash clusters 1-2mm away from the waterline for the best natural look. The most common reason for itchy lashes after application is from applying your DIY lash clusters too close to the waterline.
CLAMP YOUR LASHES
Wait 1-2 minutes then clamp your lashes together with the DIY lashes and gentle push your applicator up with the help of your sticky-free DIY lash applicator.
Repeat the same 1 to 3 steps with the other eye while your first eye's lash bond is drying.
step 5 and last step
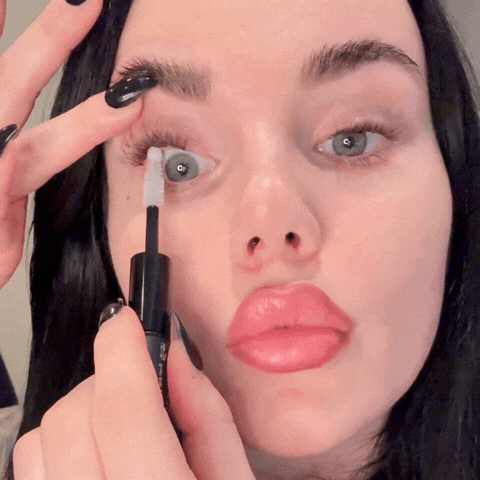
SEAL everything together
After each eye is fully lashed it's time for the last step!
The Sealer which helps the lash bond to fully seal and lock in to your natural lashes. Apply at the DIY cluster's lash band and not as a mascara. The sealer creates a layer of protection from water and will dry down sticky if applied anywhere else where there's no lash bond applied.

Enjoy 7+ days of appointment-free lashes
Now you're all done! Enjoy your fresh set of HAYATI LASHES and prepare for constant compliments. No appointments, no obligations. Your time is best spent entering your new era instead of laying down on the lash bed.
Shop your new favourite lashes